IPad mini 4 Battery replacement
I will tell you how to replace the battery on the iPad mini 4. Before we start, we need to have the right tools to start the repair. The repair you can find in the description proper heating requires removing the iPad screen. To do this, we use a heating pad designed for tablets and cell phones. On iPad devices, make sure that the tablet heating mode is selected on the front. And leave it until the heating is complete. Alternatively, you can use a heat gun or hair dryer. Once the heating is complete, use a suction cup on the sides to lift the front screen.
Insert some plastic pliers or stiff tools between them and cut the glue around. Be careful to pull on the flexible cables attached to the logic board. Then lift the screen 45 degrees off the top and then remove the screens by loosening the four screws. Then disconnect both the LCD and touchscreen plugs, as well as the battery plug.
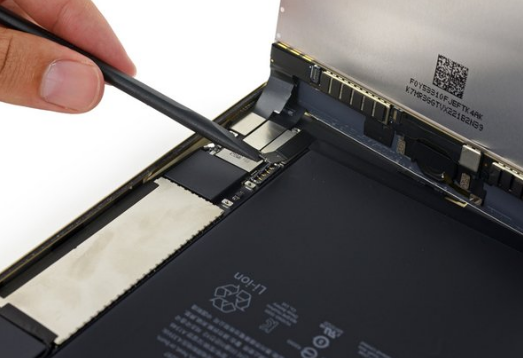
The LCD unit can now come out of the housing. To remove the battery, first loosen the adhesive by applying some heat. This time, apply heat to the back side, again, we use a heat mat for this process. Then use a plastic car gouge or something similar to cut off the glue under the battery. Be careful in this process and remove the broken battery. Then install the new battery by adding glue and secure the connector to the board. Place the LCD display and touch unit into the case, securing the two plug connectors.
Make sure the connections are secure and then on the screen by inserting the four screws. Before clamping, check the functionality of the screen and then secure the screen to the case by adding adhesive, you can use b7000 glue or a new double-sided adhesive. Finally, we use screen clips to attach the screen to the case. If not, you can use rubber bands and leave them in for a while.